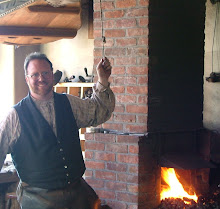
One of the pleasures of blacksmithing is the ability to make new tools as needed. We needed some bottom swages for use in the anvil to complete a current project. We made them as needed. This is just one way to make them, as it suited the tools available in our traditional shop.

Start with a piece of steel with enough mass for the tools. In this case we used a piece of steel cut from a hammer head. Square it to the desired size and start the job.

Any tool used in the anvil needs a square stem to hold it in place in the square Hardy hole of the anvil. We achieved this by fullering the piece down to the desired size using a handled fuller, a striker with a sledge hammer, and the anvil.
Fullering the hardy stem:


Once the hardy stem is done, it is time to shape the working end. The face of the tool is taken to a forging heat, placed in the hardy hole, and the appropriate sized groove sunk into the face by driving a tool into the hot steel.

Sinking the die impression:

We cleaned up the forged die with a rasp (file) while it was still hot.:

Then we examined the die for problems or areas that need more work:

Here is the finished die and one of the collar pieces it was created to shape:

Some projects require making more tools than others. Our ongoing weathervane project has led to the making of custom tongs and two sizes of bottom swage tools for the anvil. Now that we have these tools, it expands the options of tools that can be used for future projects.
I've never done any forging, though I hope to remedy that eventually. Good post!
ReplyDeleteNeat!
ReplyDeleteSteve,
ReplyDeleteAppreciate the description on the making of the hardies, how do you quench and temper them? Are they used in one direction only? I would guess that after hammer forging it to the hardie hole, it would kind of form fit in that direction. Is that so?
Just curious!
Best regards,
Albert “Afghanus” Rasch
The Rasch Outdoor Chronicles™
The Best Turkey Hunting Tips!
Albert,
ReplyDeleteYou are right that the hardie fits best in one direction due to the hardie hole being a little irregular. Ours is just loose enough that we can rotate it 90 degrees, but it works best one way.
This one is medium carbon steel, and was left as forged. It was not hardened. But if it had a cutting edge we would harden it in oil, then temper to dark blue spring temper. For hardie tools we temper them a little soft so they will mushroom rather than break or spall if misused.
Steve
Did you ever fire those two pistols you made?
ReplyDeleteSteve,
ReplyDeleteI saw that you do courses in blacksmithing, I would like to take one sometime, my brother has always been interested and made a couple of his own forges, maybe I'll take him along as a birthday present....
I was also wondering if you could get a message to Farmer Wayne, I managed to find a price for his Corn Sheller from the right time period, $6-$10 at this link http://www.vermonthistory.org/index.php/corn-sheller.html which is $102-$170 inflation adjusted by http://www.westegg.com/inflation/infl.cgi which claims to use CPI numbers, seems a bit low to me.... but you most likely have better resources for determining that.
Thanks for all you guys do over there to preserve a way of life that will be lost otherwise.
Kevin Kling
This comment has been removed by a blog administrator.
ReplyDelete
ReplyDeleteThank you so much for this post.
Wood fence gate latch
Gate Handles
Gate Lock with key
Gate Handles
Gate latch hardware
Hinges and latches
Gate Hardware
Wooden Gate Latches
Wooden Fence Gate Lock
Two Way Gate Latch
2 Way Gate Latch
Gate Hinges and Latches
Black Hinges
Exterior Door Hinges
Outdoor Gate Hinges
Outdoor Gate Hardware
Garden Gate Hardware
Thanks again for the post.Really thank you! Great. blacksmith
ReplyDeleteWow :)
ReplyDeleteThis is an incredible collection of ideas!
Waiting for more helpful pieces.
You would amazing to read a similar one here-
DiYsBest