Thursday, December 15, 2011

Winter Snow on the Blacksmith Shop.

Winter is here in Central New York as we head into the Holiday Season.


Warmest Holiday wishes from all of us at the Peleg Fields Blacksmith Shop!

Thursday, December 8, 2011

Candlelight Evening at the Blacksmith Shop - 2011


Our busiest night of the year is Candlelight Evening, Saturday Dec. 10th, 2011. Thousands of candles and several bonfires will light up our grounds at this yearly event.

Many visitors make a special trip for this event each year. It is the only chance to experience the whole Museum after dark! The Museum opens at 3pm and closes at 7pm.

It will be a busy night in the Peleg Field Blacksmith Shop. We will have 6 blacksmiths working in the shop Saturday night.


Our projects will include making large door hinges and forging a large cross pein sledge-hammer head. It should be a good night with lots of big iron being heated in the fire and worked at the anvil.


If you come to Candlelight Evening swing through the shop and say hello. We may not be able to talk long as we will have a lot of irons in the fire!  Come enjoy the candlelight, firelight, and hot mulled cider!  Best wishes for a Happy Holiday from all of us in the Blacksmith Shop.

Wednesday, November 23, 2011

Blacksmith Tool Making: Forging a Flatter.

One of the more unusual tools used in Blacksmithing is the Flatter. It looks like a strange square hammer, but is really a tool that is held on the iron and struck with a hammer. It is used to smooth out bumps and hammer marks from the finished iron.


This is a difficult tool to forge due to the huge difference in size between the square working face and the body of the tool. They could be made by forging from one piece or by forge welding two pieces together. We made one by forging it from one piece.  Blacksmith Eric is shown in these pictures.


The starting size was a bar 1.25 inches in diameter. That was upset while hot until it reached 2.25 inches in diameter. That requires the difficult and repetitive work of upsetting.


The body of the flatter then needs shaping. The hammer hole is hot punched through the body.


The tool is hot filed to get closer to the finished shape.  After it has cooled it can be filed to the finished shize and shape.

The flatter will be cleaned up, get a wooden handle, and be put into use.

Thursday, November 10, 2011

Tool Making: Forging a Tobacco Spear


At the Peleg Field Blacksmith shop we get to make or repair a lot of tools. This year the Lippitt farm experimented with Tobacco, a crop once common from Conneticut through New York and the Genesee reigion.

What is a tobacco Spear? It is a removable point put on a sawn piece of lathe. It allows you to harvest the tobacco by drying it on a stick hanging from the rafters. The point is threaded through the heavy stalk the and plants are hung to dry on the lathe.


How was it made? The hollow socket is made by cutting 16 gauge sheet metal to match our template. It is folded hot into a flattened cone-shaped tube. The edges overlap and will be forge welded.


Forge welding a hollow object presents some difficulties. How can you hit it to weld without crushing it? We made a mandrel that fits inside the socket and holds it while welding. That worked fairly well.
Socket and point parts.


The socket is fluxed and forge welded. Then the point, which is forged from solid bar, is inserted into the socket and that is forge welded into place.
Welding the point

The finished Tobacco Spear was sent down to the farm and was used in our harvest.


Friday, October 28, 2011

First Snow at The Farmers' Museum, Fall 2011

In the Leatherstocking Region it isn't unusual to get the first snow before Halloween.  Our first good snowfall was the evening of Oct. 27th.  The morning of Oct. 28th dawned clear and snowcovered.

The Empire State Carousel looks smart decked out in snow and still flanked by fall foliage!


It looks frosty in the Historic Village today.


The Lippitt Farmstead has a blanket of white.


Buck and Bright are out in the snow, and are complaining that they haven't gotten their morning hay yet!


The First Snow makes for a pretty day at The Farmers' Museum.  Most of this snow will be gone by the end of the day.  It is just a taste of what is still to come.

Monday, October 24, 2011

Making Hammer Handles - Splitting out the wood.


In the traditional Blacksmith shop at The Farmers’ Museum we make and repair tools as needed. Several times a year we need to make a new ash hammer handle. We have discussed in the past how a Froe is used to split out the billets of wood to make the handles. Then we use the drawknife and Shaving Horse to shape the handle. But where to we get the billets of wood to start with? They don’t look like modern lumber.


We are fortunate to have many acres of forest as part of our farm. This fall both Hurricane Irene and Tropical Storm Lee brought high winds to our area this fall (2011). Several mature Ash trees were uprooted in the woods. As the damage is cleared we put aside some logs to make tool handles and other things.  One foot, two foot, and three foot sections went in the shed to make hammer and sledgehammer handles. 


Using an axe, a sledge and wedges, and a mallet and froe we split up the wood into billets to dry for future tool handles. First the logs were split into halves, then quarters, then eighths. Sap and heart wood is split off if it looks weak. Knotty pieces not good for handles go into the kindling pile.


The Froe is used to split off the bark and wet cambium layer. The resulting billets are sqaure or keystone shaped in cross section.  This will let the handle billets dry evenly and be less likely to check.


Some may be used for hammers. Other to make chisel, screwdriver, or file handles. It is good to have a stockpile against future need.


Monday, September 19, 2011

Blacksmith's Coal: Filling the Coal Bin for another year!


Each year our shop uses about two tons of bituminous coal. Our fires are burning in the forge seven days a week for half the year, and are busy throughout the winter months as well. Each fall it is our chore to refill the coal bunker.  It is a woeful site to see an empty coal bin!  You can see the line from the coal when full on the bricks of the upper right side of the coal bunker.


The Fields Blacksmith Shop coal bunker built into the hill behind the shop. It is like a stone and brick tunnel that goes 14 feet into the hillside underground. There is no way to put coal into it from the outside. All the coal is hauled through the shop and into the bin using a wheelbarrow.


The coal to fill the bin is waiting outside the shop. We shovel a wheelbarrow full of coal and wheel it through the shop. Weave it around the anvil and tools then push it up a ramp. Keep pushing hard as it plows through the coal and stop when you reach the back wall. Pull one of the removable sides off the wheelbarrow and dump it sideways. As the coal piles up the roof is too low to dump the barrow forward!

Keep loading and pushing the wheelbarrow. It takes 15 shovel loads to fill the wheelbarrow. Each load make a small difference in the pile. It may take around 100 loads to get it all in. Here is what the pile looks like after 35 loads have been taken into the coal bin. We are making progress! Only 65 more trips!


After bringing in 5 wheelbarrow loads a shovel is used to level the pile in the bunker. You have to make a path for the wheelbarrow to drive up the coal to dump the next 5 loads! Keep piling it up until the wheelbarrow won’t fit over the coal and starts hitting the roof. Then keep filling in front of the pile until the coal bin is full. 


It is a long and steady job to fill the coal bin for the next year. It usually take us about two weeks. We try to do at least an hour of moving coal each morning. It is better to move the coal in a light rain, as then the damp coal doesn’t make any dust. It isn’t much fun loading coal in a cold September drizzle. Hopefully we will get it done before October.  At least when it is done the coal will  be stored accessible from inside the shop and dry.  We won't have to go outside in the winter and shovel a path through the snow to get some coal!


Coal is something that warms you twice.  You are warmed once when you move it and again when you burn it!  If you visit the Fields Blacksmith Shop you can see for yourself how much progress we have made, and how much is in our coal bin. 

Wednesday, August 10, 2011

For the want of a little forged hook - Making Hardware at the Blacksmith Shop.

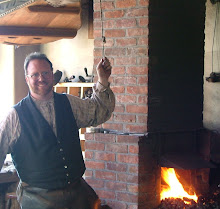
Our Blacksmith shop has played a restoration and repair role within The Farmers’ Museum since 1946.


We never know what project will come in next for repair or what will need to be made. One of the smallest jobs this July was a request from the Farmers for a small hook. It proved to be a small job with an important effect!


The Farmers came to the shop and said,


“We need a little forged hook.”


I asked, “Why to you need a hook?”

They replied, “To hold a string.”


I wondered, “Why do you need to hold the string?”

They replied, “To hold the door.”

I asked, “What door?”

They replied, “The Brooder House door."

"What does the Brooder House do?"

“It holds the hen that sits on the eggs.”


So it turns out they needed a hook to hold the string,

They needed the string to hold the door,

the door to that closes the Brooder House,

the Brooder House that holds the hen,

the hen that sits on the eggs,

the eggs to hatch eleven chicks!

Which the little hen did!


So indirectly my little hook led to there being eleven new Dominick chicks at The Farmers’ Museum! Little things like forged hooks and unhatched eggs can have big results. 


Sunday, July 31, 2011

Introduction to Engraving Steel - Classes coming in August and October 2011!


We teach a wide variety of classes in traditional craft at The Farmers' Museum.  I am particularly proud to offer a new class on engraving steel using traditional hand tools.  The instructor is Paul Spaulding, Master Blacksmith and the engraver of our Scottish Pistol Project.  He will guide students through the theory and methods of engraving steel.  Each class will have a maximum of 6 students.  All will have a full set of tools provided to practice engraving.


The Introduction to Engraving Steel with Hand Tools is a two day class.  The cost is $150 for a two day class with group and individual tutorials.  It is offered August 6th and 7th, as well as October 8th and 9th.  The August class has openings.  For more information or to enroll call The Farmers' Museum at 607-547-1461. 


Students will learn tips on how to design and lay out projects, and the basic methods of using a hand engraver and hammer to engrave steel.  Attention will also be spent on how to choose the type of engraving chisel for the work as well as how to sharpen, hold, and use the engravers. 


You are not likely to have mastered engraving by the end of the course but will have a firm foundation to begin practicing on your own.  If you have an urge to try your hand at engraving steel using simple traditional tools this may be the place to start!

Thursday, March 24, 2011

Making Tools for the Anvil: Bottom Swage

One of the pleasures of blacksmithing is the ability to make new tools as needed. We needed some bottom swages for use in the anvil to complete a current project. We made them as needed. This is just one way to make them, as it suited the tools available in our traditional shop.

Start with a piece of steel with enough mass for the tools.  In this case we used a piece of steel cut from a hammer head.  Square it to the desired size and start the job.

Any tool used in the anvil needs a square stem to hold it in place in the square Hardy hole of the anvil.  We achieved this by fullering the piece down to the desired size using a handled fuller, a striker with a sledge hammer, and the anvil.

Fullering the hardy stem:

Here you can see we have the hardy stem well formed:
Once the hardy stem is done, it is time to shape the working end.  The face of the tool is taken to a forging heat, placed in the hardy hole, and the appropriate sized groove sunk into the face by driving a tool into the hot steel.

Sinking the die impression:

We cleaned up the forged die with a rasp (file) while it was still hot.:

Then we examined the die for problems or areas that need more work:

Here is the finished die and one of the collar pieces it was created to shape:
Some projects require making more tools than others.  Our ongoing weathervane project has led to the making of custom tongs and two sizes of bottom swage tools for the anvil.  Now that we have these tools, it expands the options of tools that can be used for future projects.
Blog Widget by LinkWithin